ONLYOFFICE Docs is an open-source collaborative office suite. It contains three editors for text documents, spreadsheets, and presentations, fully compatible with Office Open XML formats and enabling collaborative editing in real-time.
Features fo Onlyoffice
Onlyoffice Doсs Features The Following:
- Compatibility with MS Office and OpenDocument formats : .docx, .xlsx, .pptx, .odt, .ods, .odp, etc.
- Editing and styling feature hyperlinks, customizable tables and charts, pictures, auto shapes, formulas or text objects, multi-level bulleted or numbered lists, and more.
- Pivot tables, slicers, data validation, over 400 available functions and formulas, filters, and sorting in spreadsheets.
- Collaborating capabilities: two co-editing modes (Fast, in which you can see what everyone is typing in real-time, and Strict, in which you can lock the paragraph you are working with), document comparison, commenting, reviewing, tracking changes, integrated chat.
- Document sharing permissions: full access, read-only, review, comment, form filling, download, and custom filter.
- Extending functionality with existing plugins: Mendeley and Zotero for creating bibliographies, Google Translate, word counter to count words and characters in the selected part of the document, text to HTML converter, Telegram chat, and Typograph for quick text correction.
- ONLYOFFICE Docs can be integrated into various productivity solutions and content management applications via ready-to-use connectors: Nextcloud, ownCloud, Nuxeo, Plone, Moodle, Chamilo, Confluence, Alfresco, SharePoint, Liferay, HumHub, etc.
Let’s look at how to install ONLYOFFICE Docs Community Edition Linux version on Debian, Ubuntu, and derivates.
Hardware Requirements
- CPU: dual-core 2 GHz or better
- RAM 2: GB or more
- HDD: at least 40 GB of free space
- Additional requirements: at least 4 GB of swap
- Additional requirements:
- PostgreSQL: version 9.1 or later
- NGINX: version 1.3.13 or later
- libstdc++6: version 4.8.4 or later
- Redis
- RabbitMQ
Install ONLYOFFICE Docs using .deb package
Installation with Debian-based distributions also requires the presence of libstdc++6, NGINX, and PostgreSQL in the system.
There are other dependencies installed automatically when you use Ubuntu 14.04 LTS or later:
- libcurl3
- libxml2
- supervisor
- fonts-dejavu
- fonts-liberation
- ttf-mscorefonts-installer
- fonts-crosextra-carlito
- fonts-takao-gothic
- fonts-opensymbol
Earlier distributions might require manual installation.
Step 1. Installing and configuring PostgreSQL
ONLYOFFICE Docs uses NGINX and PostgreSQL as databases. Dependencies found in the system repository will be installed automatically at ONLYOFFICE Docs installation using the apt-get install command.
To install the PostgreSQL version included in your version of Ubuntu, run the command:
- sudo apt-get install postgresql
Create the PostgreSQL database and user:
The created database must have onlyoffice both for user and password.
- sudo -i -u postgres psql -c “CREATE DATABASE onlyoffice;”
- sudo -i -u postgres psql -c “CREATE USER onlyoffice WITH password ‘onlyoffice’;”
- sudo -i -u postgres psql -c “GRANT ALL privileges ON DATABASE onlyoffice TO onlyoffice;”
Step 2. Installing rabbitmq:
- sudo apt-get install rabbitmq-server
- Ubuntu 18.04 will require to install nginx-extras. To do that, run this command:
- sudo apt-get install nginx-extras
Step 3. Changing the port
If you want to change the port, you will need to change the default port for the debconf system, running the command:
- echo onlyoffice-documentserver onlyoffice/ds-port select <PORT_NUMBER> | sudo debconf-set-selections
You should write the port number instead of the <PORT_NUMBER> in the above command line.
Step 4. Installing ONLYOFFICE Docs
Add GPG key:
- sudo apt-key adv –keyserver hkp://keyserver.ubuntu.com:80 –recv-keys CB2DE8E5
- Add ONLYOFFICE Docs repository:
- sudo echo “deb https://download.onlyoffice.com/repo/debian squeeze main” | sudo tee /etc/apt/sources.list.d/onlyoffice.list
- Update the package manager cache:
- sudo apt-get update
- Install mscorefonts:
- sudo apt-get install ttf-mscorefonts-installer
- Install ONLYOFFICE Docs:
- sudo apt-get install onlyoffice-documentserver
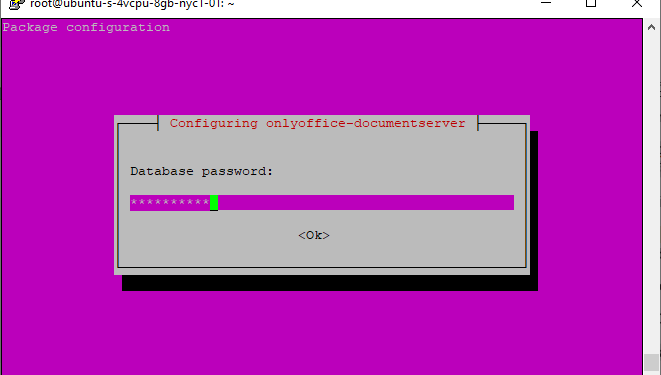
During the installation process, you will be asked to provide a password for the onlyoffice PostgreSQL user. Please enter the onlyoffice password that you have specified when configuring PostgreSQL.
Use the official documentation to install ONLYOFFICE Docs on CentOS with rpm package.
Alternative Ways of Installing ONLYOFFICE Docs
Installing ONLYOFFICE Docs using Docker.
- sudo docker run -i -t -d -p 80:80 onlyoffice/documentserver
- If you want to change the port, use the -p command. Example for port 8080:
- `sudo docker run -i -t -d -p 8080:80 –restart always onlyoffice/documentserver`
Installing ONLYOFFICE Docs from snap package.
Snapd is included into most of modern distributions. You only need to either enable or install it with the commands:
- sudo apt update
- sudo apt install snapd
Now ONLYOFFICE Docs can be easily installed using the following command:
- sudo snap install onlyoffice-ds
Running ONLYOFFICE Docs
Once the installation is finished, you can easily run ONLYOFFICE Docs using a secure connection at http://localhost.
To use ONLYOFFICE Docs, you’ll need to integrate the suite with a document management system (DMS) or your own web application. An integration example is provided by default on the ONLYOFFICE Docs welcome page:
Follow these instructions to equip your users with online editors and collaborate on text docs, spreadsheets, and presentations within the interface of your favorite platform. For example:
In this article, we have described how the Community version is installed. You can use its basic editing tools as long as you respect the GNU AGPL v.3 licenses.
In case you are seeking for a scalable solution with pro features, priority access to security fixes and regular updates as well as professional technical assistance, you can opt for ONLYOFFICE Docs Enterprise or Developer which can be embedded into your own solution and deployed under your corporate brand.
Follow Techdee for more!


