What Does Zero Fill Hard Drive Mean?
Zero fill hard drive means deleting all the data on the hard drive and overwrite it with a new data, here use a zero value. At the same time, another change is file system of this device, you can change it to NTFS/FAT32 per your needs. After zero filling, you can use it to store data again or simply remove personal information or sensitive data for selling or donating.
Why Do You Need To Zero Fill Hard Drive From Bootable USB?
Before saying “zero-fill hard drive from bootable USB”, let’s talk about why not wipe a hard drive in Windows 10/8/7. The most common reason is that you cannot boot your computer and access its desktop due to startup error, such as your computer ran into a problem loop, or system failure, such as operating system not found.
Another reason is probably because you want to wipe hard drive from BIOS and then reinstall or clean install Windows on it, which cannot be done within Windows.
Reading here, you may know the answer, either your computer is unbootable or you need to perform the operation under the Windows PE environment.
How To Zero Fill Hard Drive From Bootable USB?
Here comes to the core content of this article, how to wipe hard drive from bootable USB? The first thing, obviously, you need to create a bootable USB using either media creation tool or free backup software AOMEI Backupper Standard. After that, grab some disk wiping methods and wipe hard drive with one of them. Don’t worry about it, you will learn all of them in the following.
How To Create Bootable USB?
Method 1: Create bootable USB using media creation tool
Step 1. Go to the download page of Microsoft Windows 10. Then, scroll down to Create Windows 10 installation media and click Download tool now.

Step 2. Select Show in the folder option to view the .exe file.
Step 3. Download the .exe file to open the Windows 10 Setup window. In the license terms window, click Accept.
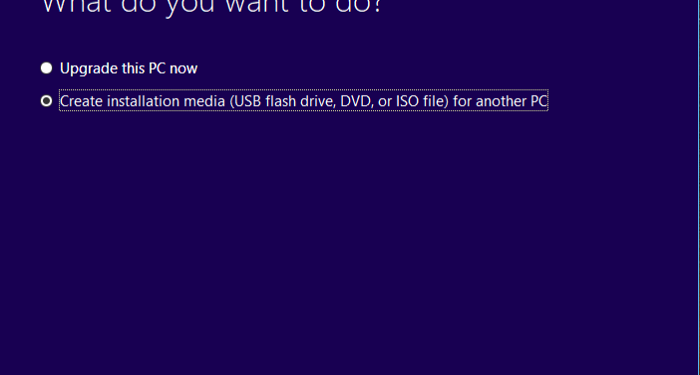
Step 4. In the What do you want o do window, click Create installation media(USB flash drive, DVD, or ISO file) for another PC?
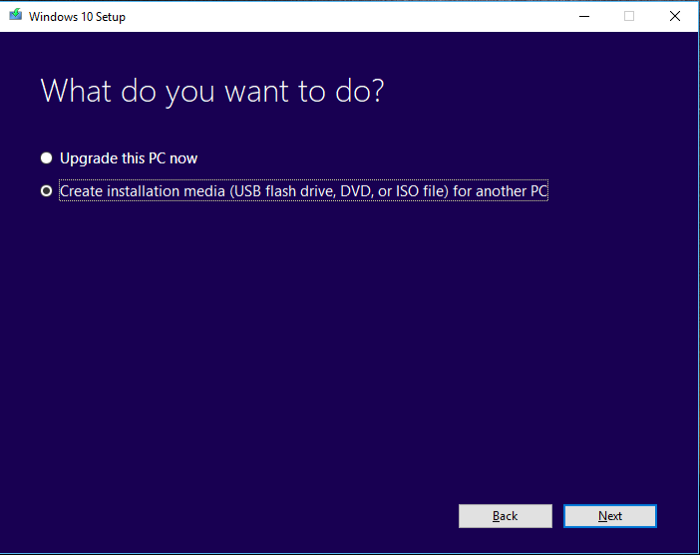
Step 5. In the Select language, architecture, and edition window, Use the recommended options and click Next.
Step 6. In the Choose which media to use window, select USB flash drive and click Next.
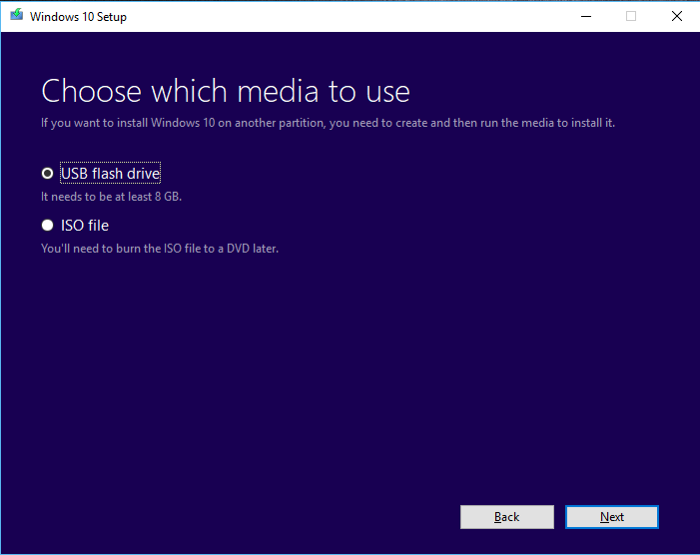
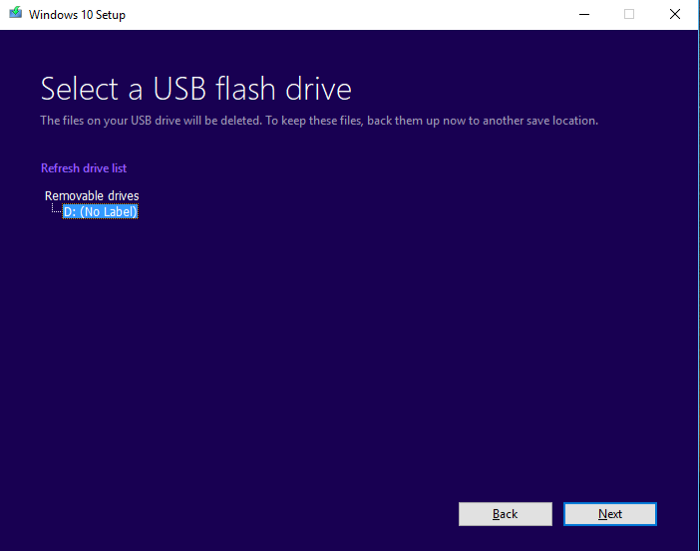
Step 7. Connect your USB drive and refresh the drive list. Select it and click Next, it will automatically copy Windows installation to your USB drive and make it bootable.
Method 2: Create bootable USB with AOMEI Backupper
Step 1. Download AOMEI Backupper Standard on its official site and install it. Then, open it, click Tools and select “Create Bootable Media”.

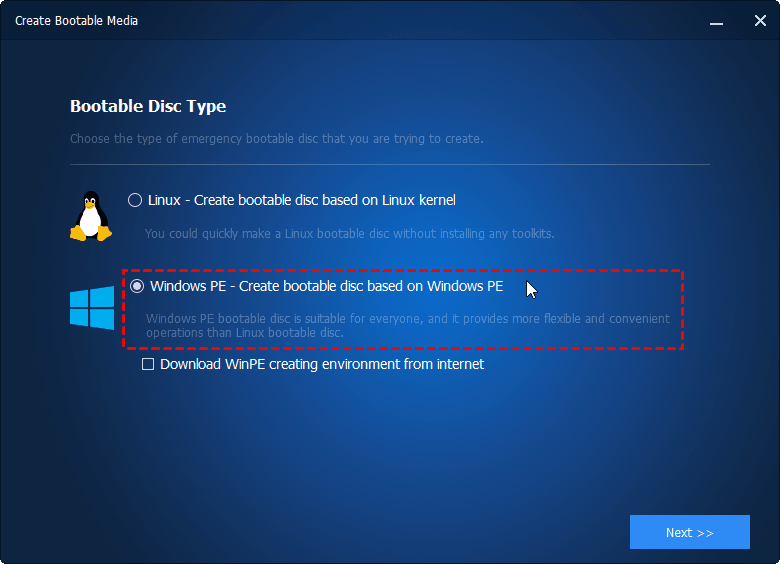
Step 2. Select bootable disc type from Linux or Windows PE, and click Next. Linux-based bootable media is limited to use basic functions of AOMEI Backupper while Windows PE allows you to access all its functions it.
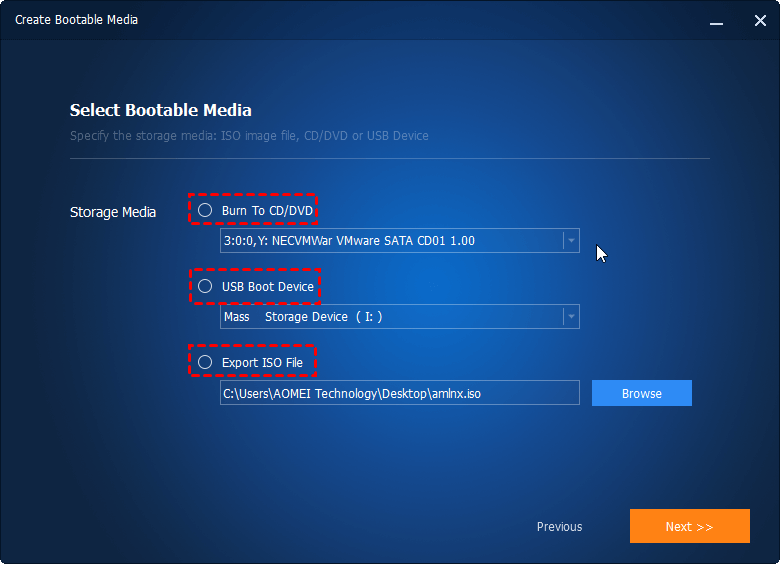
Step 3. Select bootable media among “CD/DVD”, “USB Boot Device” or “Export ISO File”. Then, click Next, the creation process will start automatically.
Note: If you need to create a bootable disc or USB, You need to connect CD/DVD or USB drive first and be sure it can be recognized.
How To Wipe A Hard Drive With Disk-Wiping Methods?
Method 1: Format hard drive during Windows installation
Step 1. Connect the bootable USB created by the media creation tool and boot from it by making it as the first boot option in the BIOS. Then, you will see the Windows Setup window, keep the default settings and click Next.
Step 2. Click Install Now.
Step 3. Skip entering the product key, and it will be activated automatically after installation when your computer connect to network.
Step 4. Select Custom: Install Windows only (advanced) installation.
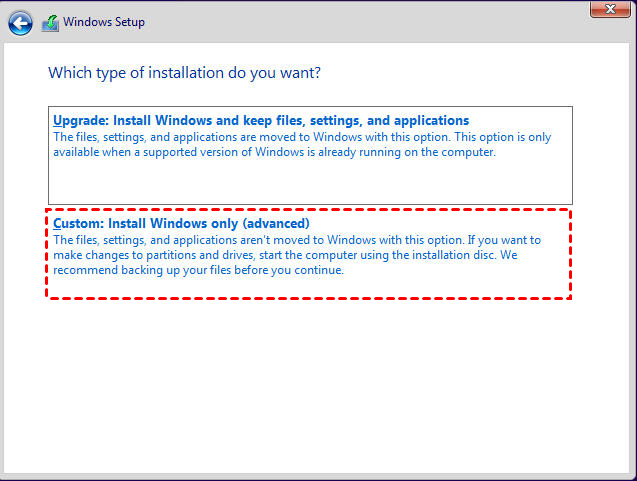
Step 5. In the next window, you will see several options including Format, just select the system partition and click Format. Then, click OK to confirm.
Method 2: Wipe hard drive from bootable USB using AOMEI Backupper
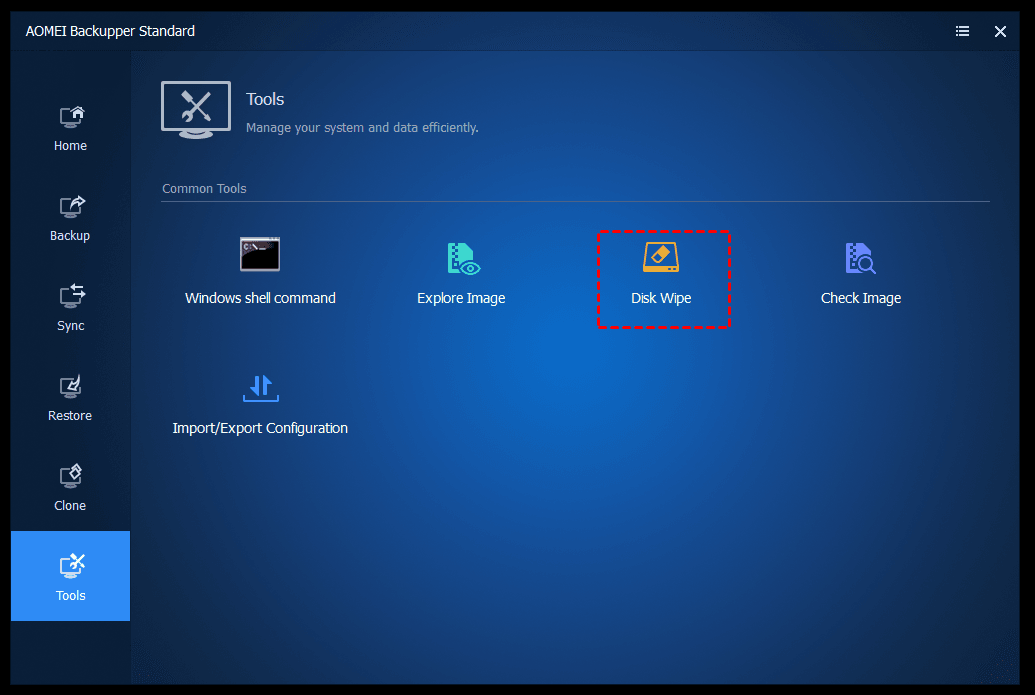
Step 1. Connect the bootable USB created by AOMEI Backupper and start your computer from it. Then, you will see the blue screen of AOMEI Backupper, click Tools > Disk Wipe.
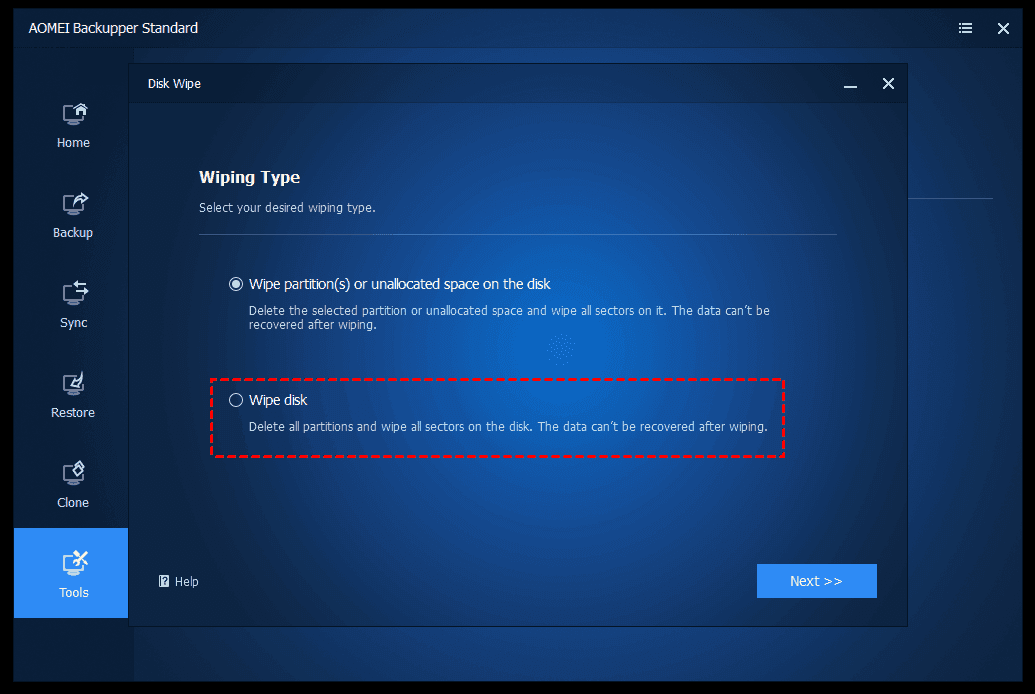
Step 2. In the wiping type window, choose Wipe disk and click Next to continue.
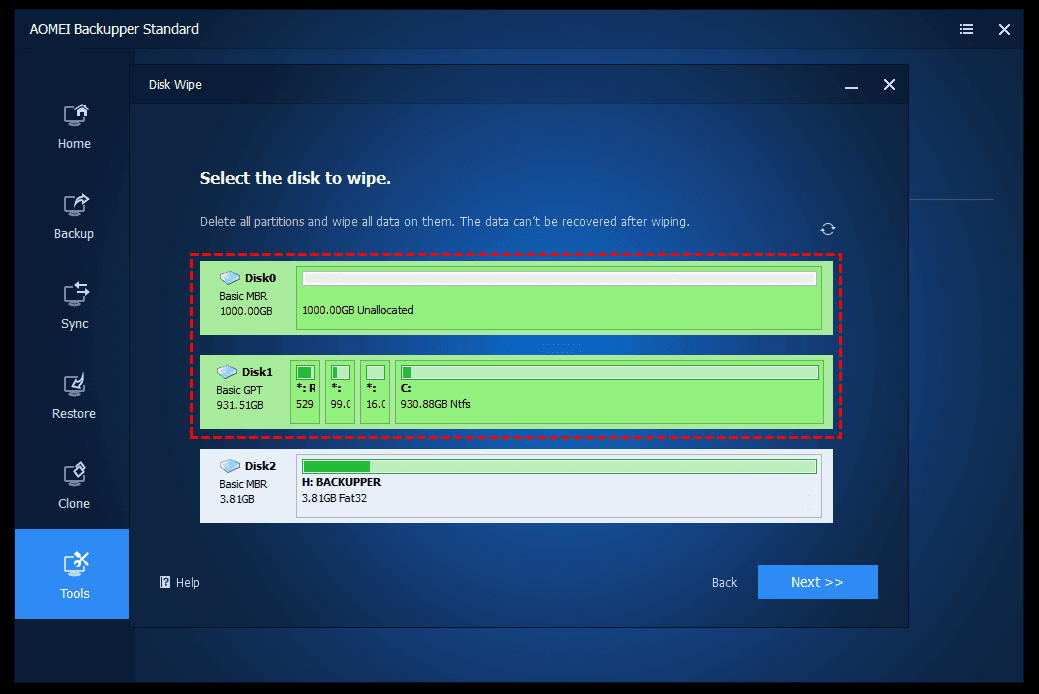
Step 3. Select the disk you want to wipe and click Next.
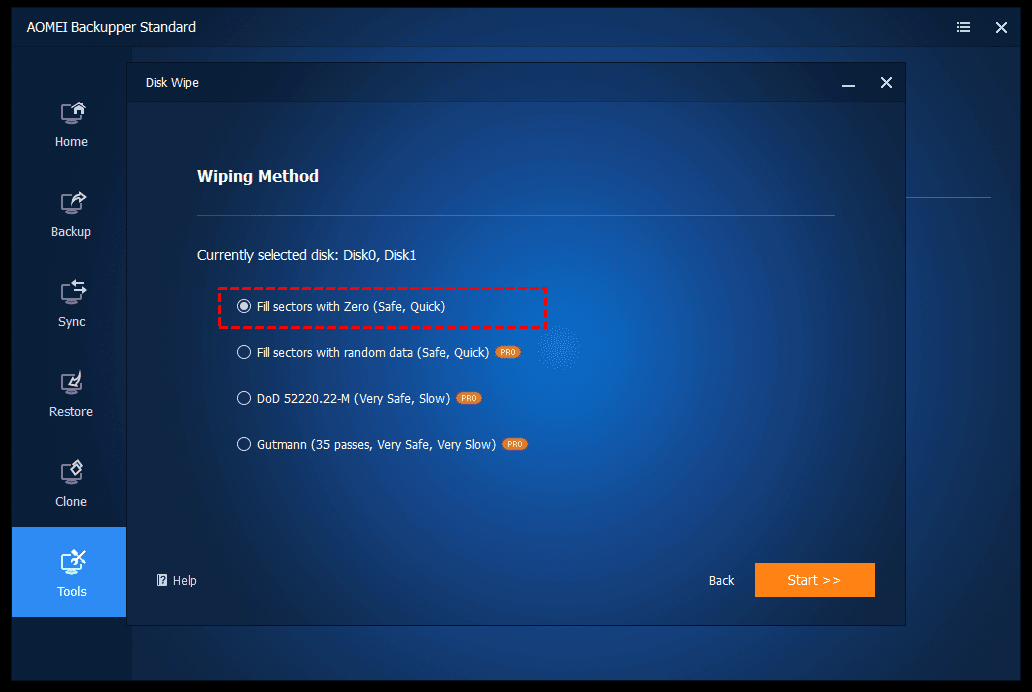
Step 4. Select Fill sectors with zero and click Start to wipe your hard drive completely.
Final words
That’s all for how to zero-fill hard drive from bootable USB, you can do it during the installation process(if you need to clean install Windows) or use a professional USB bootable clone software to complete the data erasure. It’s all your decision.
Follow Techdee for more!

